July 13, 2019
GitLab/Repo: Enable/Add sequence diagram
The steps are:
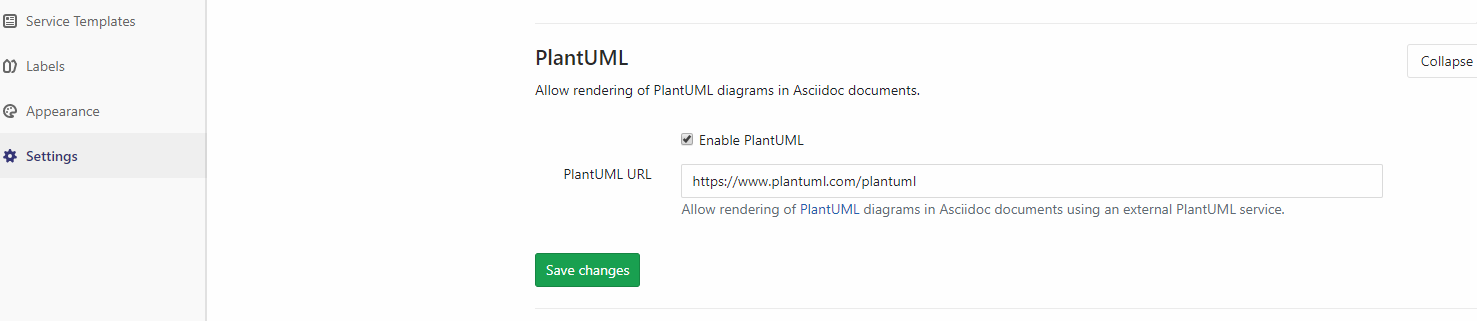
- Enable PlantUml in GitLab:
- Login to GitLab -> Admin Area -> Settings -> Scroll down to PlantUML
- Enable PlantUML
- In PlantUML URL: type “https://www.plantuml.com/plantuml” and save changes
- Use Planttext as the online PlantUML editor to build/test your diagram
- Use http://plantuml.com/ as reference for example code and documentation
- Go to your repository
- Add “Readme.md” file and click edit
- Add the code below:
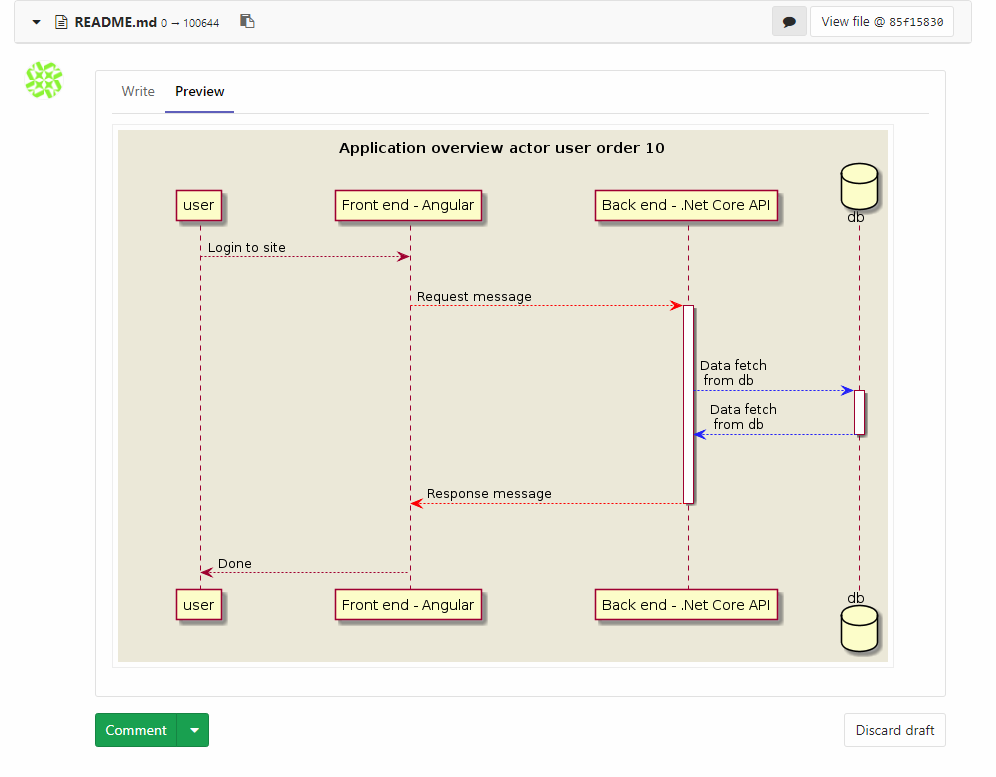
```plantuml
@startuml
skinparam backgroundColor #EEEBDC
skinparam ParticipantPadding 50

Title: Application overview actor user order 10
participant "Front end - Angular" order 20
participant "Back end - .Net Core API" order 30
database db order 40

user-->"Front end - Angular": Login to site
||20||
"Front end - Angular"-[#red]->"Back end - .Net Core API": Request message
||40||
activate "Back end - .Net Core API"
"Back end - .Net Core API"-[#blue]->db: Data fetch\n from db
activate db
db-[#blue]->"Back end - .Net Core API": Data fetch\n from db
||40||
deactivate db
"Back end - .Net Core API"-[#red]->"Front end - Angular": Response message
||40||
deactivate "Back end - .Net Core API"
"Front end - Angular"-->user: Done
@enduml
```
Edit: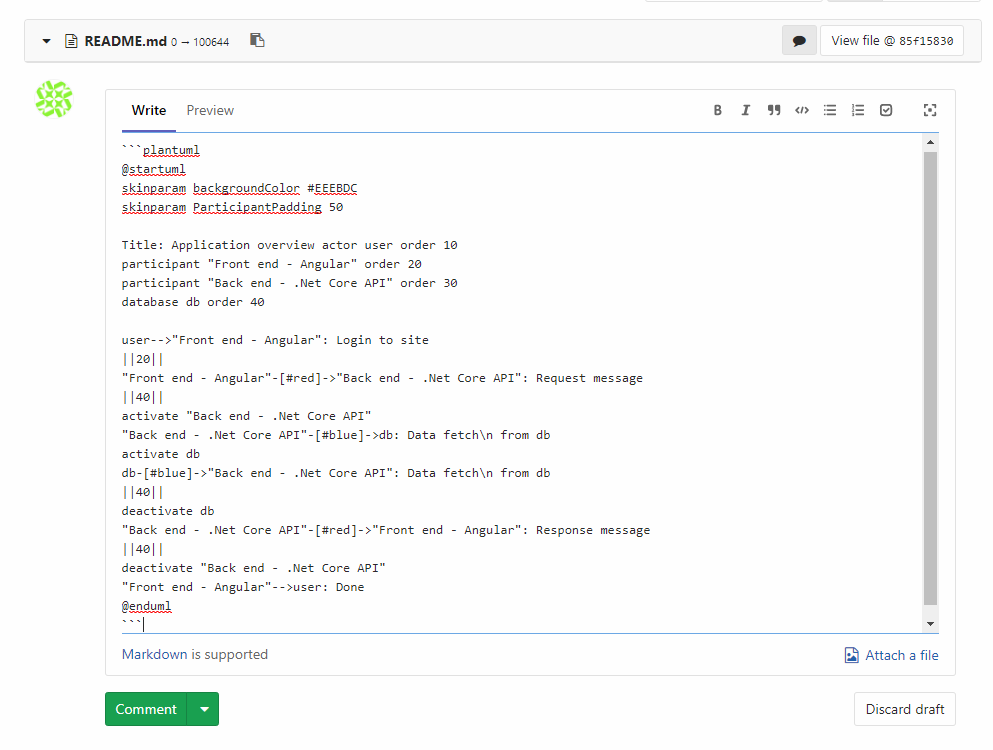
Preview: