Mount FTP server as drive in windows 7
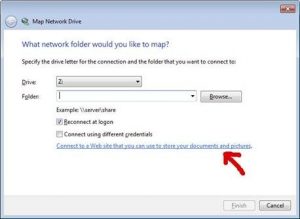
1. First open the map network wizard as shown below. If you can’t see the menu in windows explorer, press “alt” key and the menu will popup.

2. In the map network drive wizard click on the link “Connect to a Web site that you can use to store your documents and pictures” as shown below.
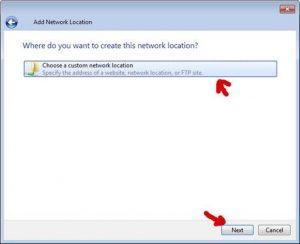
3. The “Add Network Location” wizard is shown. Click “Next” on the welcome screen.
4. Then select “Choose a custom network location” link & click next as shown below.
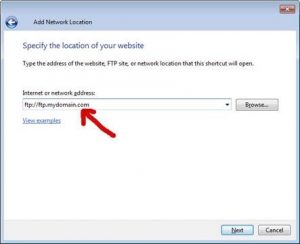
5. In “Specify the location of your website” window, type the ftp server address or the IP address of your server under “Internet or network address”. Then click “Next”
OBS: You have to type the protocol first “ftp://” or the wizard won’t accept it.
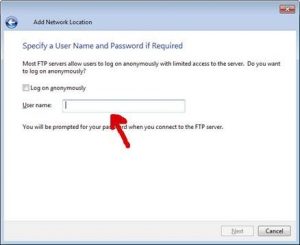
6. In “Specify a User Name and Password if Required” window, uncheck the “log on anonymously” checkbox if your ftp server require a user name and password otherwise leave it checked. If your ftp server requires user name and password, then write the user name in the user name textbox. Then click “Next”.
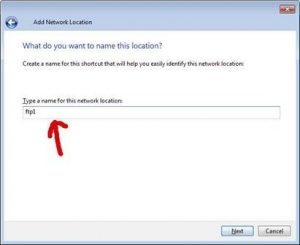
7. In “What do you want to name this location” window, type the friendly name for your ftp site under “Type a name for this network location”. This name will be shown as a “Folder” in your mapped drive. Then click “Next”
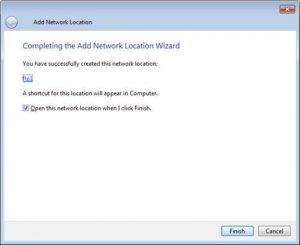
8. In “Completing the Add Network Location Wizard” window, click “Finish” to open the ftp site.
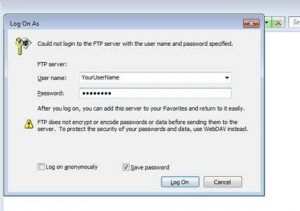
9. Then the “Log On As” windows pops up to login to the ftp site. Type your password and check the “Save password” checkbox so you don’t have to type it every time you want to access the ftp site. Then click on “Log On”
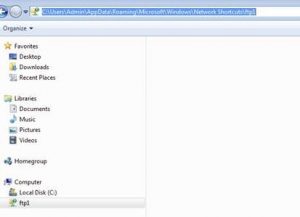
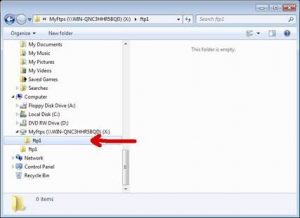
10. The Ftp site will open and you will see that you have a network link to it under your drivers as shown below.
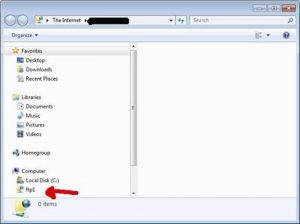
11. Now click on the ftp link under the drives, in my example “ftp1” and you will see that the address in windows explorer be “Computer –> ftp1”. Click on the address bar and the physical address on the hard disk will be shown.
12. Now in the address bar, delete “ftp1” and press enter to navigate to the “Network Shortcuts” folder.
OBS: If automatic navigation & hidden files & folder are not shown then you have to activate them as follows:
In Windows Explorer menu, click “Tools”-> “Folder Options”, click both checkboxes under “Navigation pane”. Then click “View” tab and select “show hidden files, folders & drivers”. Then click “Ok”.
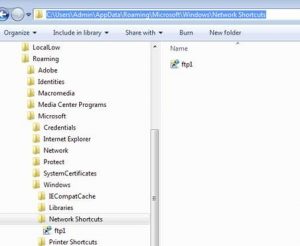
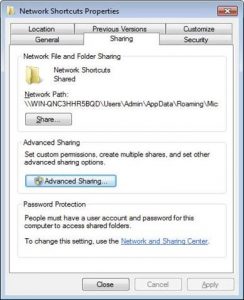
13. Under “Network Shortcuts” you will see the “Ftp1” folder. Right click “Network Shortcuts” folder and click “Properties”. Click on “Sharing” tab and click on “Advanced Sharing”
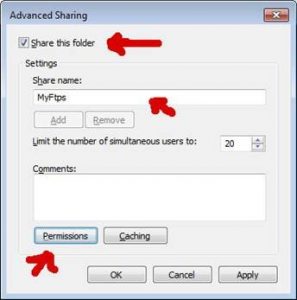
14. In “Advanced Sharing” window, select “Share this folder”, then write a share name, in my example “MyFtps”, then click on “Permission” to set who can access this shared folder. In “Permissions for MyFtps” window select “Full Control” and click “Ok”. Then click “Ok” two times to close the sharing window.
15. Now in Windows Explorer address bar type “\[YourComputerName]MyFtps” and press “Enter”, then “MyFtps” share is shown.

16. Now right click on “MyFtps” folder and click on “Map network drive…” and the “Map Network Drive” window pops up. Then choose the drive letter you want and click “Finish” and you will have the folder mapped as a drive and be able to access the ftp site “Ftp1” as a folder in your mapped drive.

Hauppauge WinTV7 change channel name
[How To] Backup Exchange 2007 on Windows 2008 Server locally with ntbackup